

Thin plastic sheet cuts stay clean when you match your cutting method to the plastic type, thickness, and shape. We view “thin” as a handling challenge. Thin sheets flex, chatter, and build heat faster than wood. We also plan the edge finish early, as a “safe edge” and a “display edge” require different cleanup.
Acrylic, polycarbonate, PETG, styrene, and vinyl-like plastics react differently to blades. We distinguish between brittle cracking and heat melting before choosing a tool. This single decision prevents most broken sheets and gummed-up blades.
Method Picker for Thin Plastic (Material + Thickness + Cut Shape)
Success depends on three factors: plastic family, sheet thickness, and cut shape. We start by identifying the material, because using the wrong method on the right tool still cracks sheets. If you are unsure, default to the lowest-stress method and run a test cut on scrap.If you cannot confirm the material from labels or a datasheet, follow our plastic identification steps to avoid choosing a method that cracks or melts the sheet.
|
Your Cut Need |
Best Starting Method |
Typical Tools |
Main Risk to Manage |
|---|---|---|---|
|
Long straight line on rigid sheet |
Score and snap |
Utility knife / plastic scoring cutter + metal straightedge |
Stress crack from flex |
|
Small trimming on very thin sheet/film |
Shears or knife on mat |
Heavy-duty shears, hobby knife |
Whitening, tearing |
|
Curves and cutouts on rigid sheet |
Saw cut with strong support |
Jigsaw + fine-tooth blade, backing board |
Vibration cracking, edge chipping |
|
Fast long cuts on larger sheets |
Saw cut with guided feed |
Circular saw or table saw + fine-tooth blade |
Heat melt if feed stalls |
Use this table as a starting point. Your final choice depends on whether the plastic is brittle (chips and cracks) or ductile (smears and melts). This behavior varies by grade and temperature.
Identify the Plastic (Acrylic, Polycarbonate, PETG, Styrene)
Rely on labels, supplier descriptions, or datasheets for identification. Look for packaging labels, offcut markings, or recycling codes before using heat-based cutting. If the material might be PVC or a vinyl blend, avoid laser cutting. Choose a knife, shear, or router instead, as many safety guides prohibit lasers for PVC materials.
Acrylic-like sheets often chip if the blade grabs. Polycarbonate-like sheets often smear and heat up, welding debris back onto the cut. Keep your first test cut short. A 2-inch test reveals problems without ruining a full panel.
Decide Hand Tools First for Thin Sheet Work
Hand tools often cut cleaner on thin sheets because they add less heat. Start with scoring for straight lines. Move to saws only when you need curves or internal cutouts. This reduces both cracking and the need to clean up melted edges.
Straight Cuts: Score-and-Snap Done Right
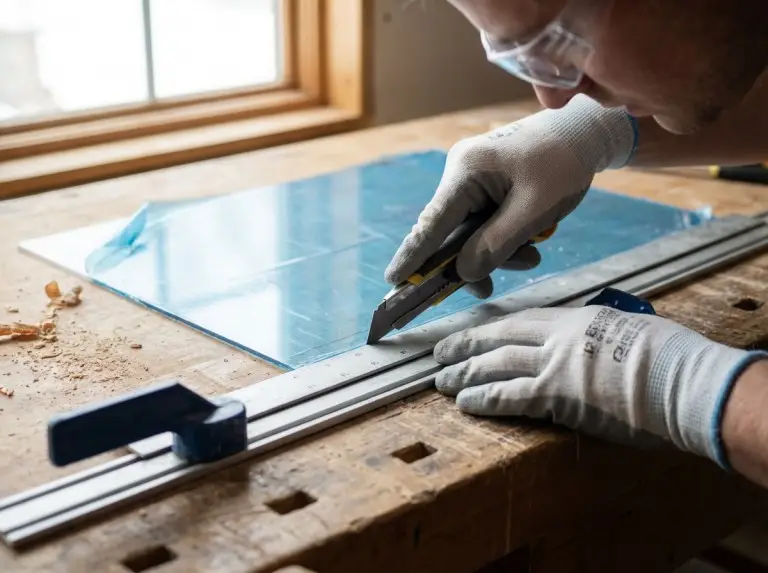
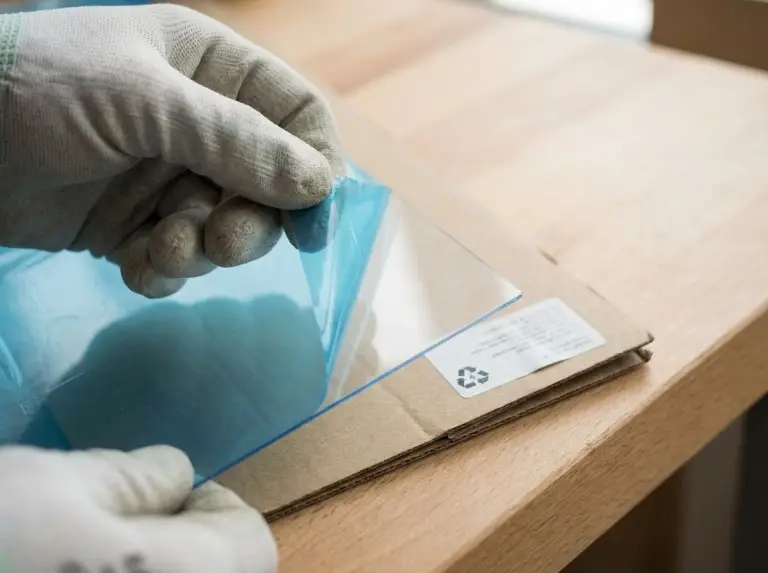
Score-and-snap is the most reliable method for straight cuts on thin rigid plastics if you can support the sheet flat. Use scoring for a clean break line rather than a saw finish. Keep the factory protective film on. It reduces scratches and provides a surface for marking.
Marking and Clamping the Straightedge
A straight cut needs a stable guide. Clamp a metal straightedge in place. Even a small shift widens the groove and creates a wandering snap. Keep clamp pressure away from the snap line to avoid pre-stressing the sheet.
If the sheet is glossy and clamps slide, add painter’s tape under the straightedge for friction. Avoid thick rubber pads that raise the guide. This changes the blade angle and groove consistency. You need a guide that stays put during repeated passes.
Scoring Passes and Groove Depth Cues
A clean snap needs a consistent groove, not a deep single cut. Run multiple passes with a fresh blade and moderate pressure. Heavy pressure can start micro-cracks in brittle plastics. Keep the blade tight to the straightedge and pull in one direction. Back-and-forth scraping widens the groove and roughens the edge.
Utility knives and scoring tools create a shallow line that acts like a controlled fracture path. This is often described as a “score like glass, then break” workflow.
Snapping Setup and Edge Control
Snap along the scored line, not from a random stress point. Align the score line with the edge of a sturdy bench. Support the “kept” side with flat pressure. Apply a firm, decisive bend to the waste side. Slow bending lets cracks wander into the finished panel.
If a crack runs off the score line, stop. Deepen the groove on both sides before trying again. Ensure the sheet isn’t hanging unsupported. Flexing before the snap pre-loads the plastic and makes the break unpredictable.
Curves and Cutouts: Jigsaw or Rotary Without Vibration Cracks
Curved cuts on thin plastic succeed when you control vibration. Vibration turns small notches into stress points that crack brittle sheets. Accept that curved cuts usually need more edge finishing, as saw teeth leave texture.
Jigsaw Setup That Reduces Cracking
Clamp the plastic to a sacrificial backing board and cut through both layers. The wood support reduces vibration and prevents bouncing. Choose a fine-tooth blade made for plastics or metal. f your panel is thicker or behaves like a higher-stiffness material, our hard plastic cutting tips explain blade selection and support tactics that reduce grabbing and edge chipping. Coarse teeth grab and chip edges.
Keep feed pressure light and motion steady. Forcing the cut can chip acrylic-like plastics. Avoid long pauses, as friction heat can soften the plastic and seal the cut closed.
Rotary Tools for Small Details Without Melting
Rotary tools make precise cuts but generate heat fast. Use short passes and let the tool clear chips. Packed chips create friction and melt. Plan to finish the edge afterward, as rotary cuts often leave a melted bead.
If the plastic smells sharp or the cut turns sticky, stop and let the tool cool. Adjust your technique to faster motion with lighter contact. Slow rubbing generates more heat than a clean cut.
Internal Cutouts Start With a Controlled Entry
Start internal windows with a clean entry hole. Drill a starter hole for the jigsaw blade and support the area underneath. This prevents the drill from flexing the sheet. A controlled entry stops the first crack that grows under vibration.
Keep drill bits sharp and use moderate pressure. Dull bits heat and grab. If the material is brittle, test on scrap and reduce pressure until the hole edge stays clean.
Cutting Very Thin Plastic Films Without Whitening or Tear
Very thin films cut best when you don’t force them to bend around the tool. Choose shears or a knife on a cutting mat. Both control stretch and reduce stress whitening. Film cuts focus more on avoiding deformation than getting a polished edge.
When Shears Work and When They Mark the Edge
Heavy-duty shears work well on thin flexible sheets if the plastic stays flat. Cut deep in the shear jaws rather than at the tips. Leverage at the throat produces a smoother line. If the edge turns white or shows stress marks, switch to a knife-on-mat approach to reduce bending.
Avoid dull scissors. They tear and pull the film. A clean shear cut should feel like slicing, not ripping.
Knife Trimming on a Cutting Mat for Clean Edges
A sharp hobby knife or utility knife on a self-healing mat produces clean edges. Use a metal straightedge for straight lines. Make a few light passes, as one heavy pass can snag and tear. Tape or clamp the sheet so it doesn’t move.
If the film curls near the blade, flatten it with a wide tool or block. Flat support creates a crisp edge instead of a wavy one.
Preventing Cracking, Melting, and Gummed-Up Blades
Failures usually come from flex, vibration, or heat. Troubleshoot by identifying the dominant cause, then change only the related setup element. This prevents endless tool swapping.
Clamping and Support Rules That Remove Flex and Chatter
Flex creates cracks because bending loads concentrate at notches. Clamp the sheet near the cut line and add a backing board if it vibrates. Avoid holding plastic in one hand while cutting with the other. Small movements create chatter that teeth amplify.
Support the offcut side of large sheets. Uneven support pulls the cut closed and increases friction.
Heat Management That Prevents Melt Beads
Heat issues appear as sticky chips, smeared edges, or plastic welding back together. Manage heat by keeping the tool moving and clearing chips. Rubbing generates more heat than cutting. Avoid pausing with the blade in contact; a stationary tooth acts like a heater.
Verify materials before laser cutting. Many warnings advise against laser cutting PVC, ABS, and polycarbonate due to fumes or poor results. Confirm the plastic type via label or datasheet first.
Quick Troubleshooting by Symptom
- Cracking ahead of the cut: Usually caused by vibration, flex, or a grabbing tooth. Fix by improving support, using finer teeth, and reducing pressure.
- Melting and gumming: Caused by too much friction. Keep motion steady, clear chips, and avoid pauses.
- Jagged edges: Caused by poor support or a coarse blade. Bring clamps closer and switch to finer teeth.
Edge Finishing for Safe Handling and a Professional Look
Finishing matters because fresh cuts can be sharp and rough. Decide if you need safe handling, a fit-up edge, or a display edge. This prevents overworking or unintentionally rounding the edge.
Deburring and Scraping for Fast Safety Edges
A quick deburr removes the razor edge without changing dimensions. Scrape lightly with a deburring tool or the back of a blade. This knocks down burrs while keeping the edge square. Work slowly near corners, as they chip first on brittle plastics.
Wipe the edge clean to remove fine dust. This reduces scratching during handling.
Sanding Progression for Function-First Clarity
Sanding improves edge feel and look. Start with a grit that removes saw marks, then step up gradually. Jumping grits leaves visible scratches. Keep the sanding block flat to preserve squareness, especially for pieces fitting into frames.
Wet sanding reduces heat and loading on some plastics. Clean water and light pressure produce a consistent finish.
Polishing Options and Material Limits
Polishing can be mechanical (buffing) or thermal (flame). We recommend mechanical polishing first. It is easier to control and works on more plastics. If using heat, test on scrap and follow manufacturer guidance. Overheating bubbles and distorts edges.
Avoid claiming one universal method for every plastic. Different plastics respond differently to heat and abrasion. A test strip saves time and material.
Conclusion
At IPG, we understand that precision cutting is just the beginning. The key to achieving a perfect finished plastic product lies in selecting low-stress processing methods tailored to the material’s properties, thickness, and geometry.
To prevent cracking or material waste, we recommend using the “scribe and break” method for straight lines, ensuring backplate support when handling curves, and always strictly controlling heat buildup. Remember, edge finishing isn’t just an afterthought—it should be a core part of your production plan, as safety edges and display edges require very different cleanup steps.
Of course, if you need to process large volumes of plastic offcuts or waste, our IPG Plastic Crushing Machine can efficiently convert these materials into high-quality recycled granules, helping you achieve a circular resource economy.
FAQ
What is the safest way to cut thin plastic without cracking it?
For straight cuts on rigid sheets, the score-and-snap method is safest because it creates minimal vibration. Keep the sheet flat, clamp a metal straightedge, and make several light scoring passes instead of one deep cut. For curved cuts, use a saw and support the sheet to control vibration.
Which tool is best for cutting thin plastic at home?
A utility knife or a plastic scoring cutter is often the best tool for straight cuts on thin sheets. This scoring approach limits heat and creates a clean, predictable break line.
How do I stop plastic from melting and sticking to the blade?
Melting is caused by friction heat. This happens when you move the tool too slowly or pause mid-cut. Keep the tool moving at a steady pace and clear away chips. Avoid stopping with the blade in contact with the plastic.
Can I laser cut thin plastic safely?
Safety depends on the specific type of plastic. Many guides warn against laser cutting PVC, ABS, and polycarbonate because they can release hazardous fumes or cut poorly. Always check the material’s label or datasheet before using a laser cutter.
How do I cut curves in thin plastic without cracks?
To prevent cracks when cutting curves, you must stop the sheet from vibrating. Clamp the plastic to a backing board. Then, use a jigsaw with a fine-tooth blade and a steady feed rate. For internal cutouts, drilling a starter hole first will reduce the risk of cracking.
What is the quickest way to make a cut edge safer to handle?
A light deburring is the fastest way to make an edge safe. Scrape the edge with a deburring tool or the back of a utility knife blade. This removes sharp burrs without changing the piece’s dimensions. You can sand the edge afterward if appearance is important.