
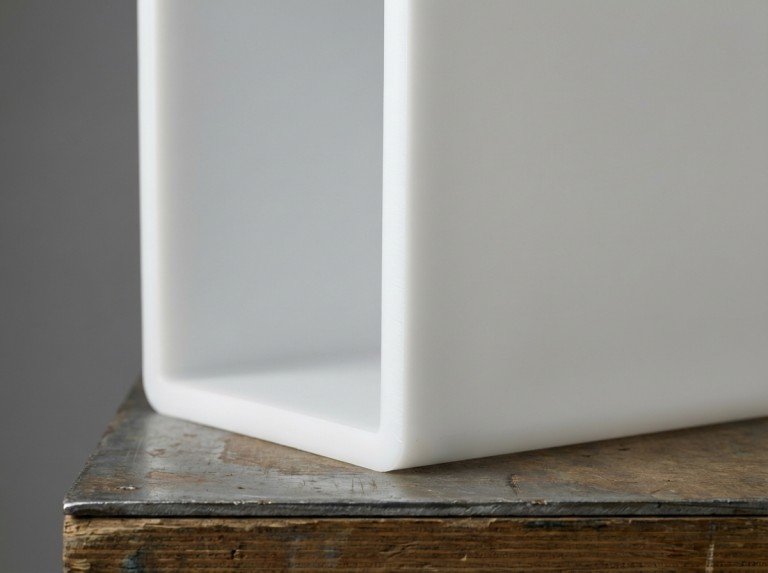
Cutting a plastic box without cracking it requires matching the method to three variables: polymer type, wall thickness, and cut shape. The wrong tool — or skipped surface preparation — produces stress fractures. These can spread beyond the cut line depending on material brittleness, residual stress from molding, and how close the cut runs to a reinforced edge.
Scope note: This article covers practical workshop guidance for cutting storage-grade plastic boxes made from HDPE, PP, and ABS. It is not a substitute for material datasheets, tool manufacturer instructions, or workplace safety requirements. Acrylic and polycarbonate are referenced where the approach differs, but cutting hard plastic without cracking or melting involves additional considerations that depend on the specific formulation and wall thickness. Methods here do not apply to insulated, foam-composite, or laminated box walls.
Why Plastic Boxes Crack
Cracking depends on three root causes: unsupported panel area, blade vibration, and heat buildup at the cut line. Blade sharpness alone does not control the outcome.
In brittle or aged materials — acrylic, weathered PP, cold ABS — micro-cracks can form ahead of the blade. They may spread before the tool reaches that section. In tougher materials like new HDPE, the more common result is edge whitening or deformation rather than fracture. The underlying cause is the same in both cases: concentrated stress at an unsupported or overheated cut zone.
Heat follows a different failure path. In polycarbonate or ABS, a stalled blade builds friction heat that softens the cut edge unevenly. This leaves a deformed zone that loses dimensional accuracy. In brittle materials, the same heat introduces a stress zone that can fracture under handling. These are two separate mechanisms. Thermal deformation affects tougher polymers; thermally assisted cracking affects brittle ones. The control method differs for each.
A common failure pattern involves two setup errors together. The panel is clamped only at the ends with the middle unsupported. The operator also slows blade speed while the blade stays in contact with the plastic. Fixing the support setup first — before adjusting tool speed — resolves most mid-cut fractures.
Choosing the Right Method
The right cutting method depends on polymer type, wall thickness, and cut shape. We verify the polymer type against the box’s resin marking or supplier datasheet before selecting a blade and clamping arrangement. Many storage boxes carry an ISO 11469 or ASTM D7611 resin symbol molded into the base. Identifying the plastic type from that marking is a reliable starting point before any blade selection.
| Plastic Type | Cut Shape | Recommended Method |
|---|---|---|
| HDPE / PP (storage totes) | Straight line | Fine-tooth handsaw or jigsaw with plastic blade |
| HDPE / PP (storage totes) | Curved / internal hole | Dremel with cutting disc, or heated pilot hole + jigsaw |
| ABS (enclosures, project boxes) | Straight or curved | Jigsaw with fine-tooth blade at low speed |
| Acrylic (transparent boxes) | Straight line, thin flat sheet | Score-and-snap for brittle flat sections; fine-tooth saw otherwise. Verify cast vs. extruded — behavior differs. |
| Polycarbonate | Straight or curved | Fine-tooth jigsaw blade; retract blade before any pause to control heat |
When the resin type is unknown, a quick flex test on a hidden section helps. Flexible materials (HDPE, PP) whiten before fracturing. ABS vs polypropylene material differences directly affect this — brittle materials fracture with little prior deformation, while flexible ones whiten first.
Setup Steps That Prevent Cracking
Workholding depends on wall thickness and how close the cut runs to ribs, rim reinforcement, or handles. The closer the cut line is to a reinforced edge, the more rigid the support needs to be.
Before cutting, we follow this sequence:
- Clamp the box on a flat surface with the cut section fully supported underneath — not just at the ends.
- Apply masking tape along the cut line and mark on the tape. Tape reduces chipping from vibration and protects the surface.
- For rectangular openings, drill two types of preparatory holes — see the note below.
- Place a wooden batten or second clamp parallel and close to the cut line to dampen panel vibration.
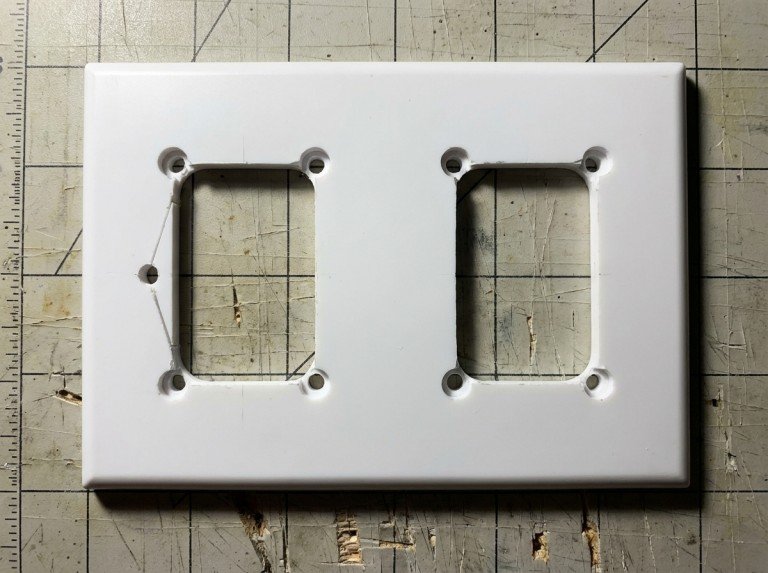
Two types of preparatory holes serve different purposes.
Corner relief holes go at each internal corner of a rectangular opening before cutting the sides. They distribute stress around a radius at the corner terminus. This stops crack propagation when the blade reaches the corner. Size the hole large enough to create a visible radius at the corner — the right diameter depends on corner geometry.
Entry holes allow the jigsaw blade to enter the panel for an internal cut. Size these to accept the blade width. Place them just inside the cut line. They are separate from the corner relief holes.
When one small hole serves both purposes, the corner relief function fails. A corner without a proper relief radius concentrates stress at a single point. The saw terminates at that point instead of running into a radius.
Plunging a jigsaw blade directly into a box wall without an entry hole is a common mistake. The blade catches the plastic on entry and starts a stress fracture ahead of the cut line. This is most common in ABS and acrylic-type enclosures, where the material has lower crack resistance.
Five Cutting Methods
Dremel with a Cutting Disc
A rotary tool with a reinforced cutting disc gives the most control for curved cuts and internal openings in HDPE and ABS boxes. Use lower speed settings and check the disc manufacturer’s guidance for plastics. High RPM with slow feed increases heat and leaves a melted bead on softer HDPE. Guide the disc along the marked line with steady, even pressure. Do not pause with the disc in contact with the plastic. Sand the cut edge with a grit appropriate to the plastic type and surface requirement.
Jigsaw with a Plastic-Cutting Blade
A jigsaw works well for straight and gently curved cuts. Match the blade TPI to the wall thickness and polymer. Thinner walls suit higher TPI to reduce impact per tooth pass. Thicker walls may need slightly lower TPI to prevent clogging. Use a blade designed for plastic or non-ferrous metal. Standard wood blades have aggressive tooth set that grabs the panel and causes vibration.
After drilling the entry hole, feed the blade steadily. If you need to pause, withdraw the blade fully from the cut first. Pausing with the blade stationary inside the cut concentrates heat at the contact point and re-welds the kerf as the plastic cools.
Hand Saw with a Fine-Tooth Blade
A hacksaw or fine tenon saw gives clean results on HDPE and PP when power tools are not available. No high-speed rotation means no heat risk. This makes it a good option for thin-walled boxes where a power tool’s vibration causes too much panel movement. Use light, consistent strokes rather than heavy downward pressure. Keep the saw perpendicular to the panel face.
Hot Knife or Soldering Iron
A soldering iron with a flattened spare tip melts a clean path through thin-walled HDPE and PP without mechanical vibration. This method requires local exhaust ventilation or outdoor conditions. Cutting thermoplastic with heat generates fumes. Follow the material’s Safety Data Sheet (SDS) for exposure guidance. Do not rely on general room airflow as the only control.
The resulting edge is smooth but slightly wider due to the melt kerf. This matters when the cut edge needs to seat against a bracket or seal. Wipe the tip often on a damp cloth to stop plastic buildup from dragging and widening the melt zone.
Score-and-Snap (Brittle Flat Sections Only)
Score-and-snap works for flat, brittle plastic sheet — most reliably thin acrylic. Cutting thin plastic without chips or melt requires a different set of controls, where polymer type and wall flexibility matter more than thickness alone. A thin, flexible HDPE wall will deform instead of snapping cleanly. A stiffer, more brittle sheet at greater thickness may snap reliably.
Score the line five to six times with a sharp utility knife. Position the scored line over a flat bench edge. Apply quick, firm downward pressure on the overhanging section. This method does not work on curved surfaces, reinforced rims, or flexible thermoplastic walls. Attempting it on a flexible-walled box produces an uncontrolled deformation rather than a clean break.
Common Mistakes That Cause Cracks and Melted Edges
Three failure patterns appear in most plastic box cutting jobs. We check against all three before any blade contacts the material.
- Inadequate support:An unsupported panel section vibrates during cutting and generates micro-cracks ahead of the blade. Adding a batten close to the cut line reduces panel flex. The effect depends on wall thickness, panel span, and batten stiffness.
- Slowing blade speed as a universal fix:In thermoplastics, a slower feed rate with unchanged RPM increases heat per unit of cut length. The right adjustment is to reduce RPM and keep a steady forward feed. Slowing the feed without reducing speed concentrates heat at the blade contact point.
- Skipping corner relief holes:A saw cut that ends at a right-angle corner concentrates stress at that corner point. A drilled relief hole at each internal corner spreads that stress around a radius. This is why corner relief holes are widely recommended, not optional.
Edge Finishing and Acceptance Checks
This is a practical workshop check, not a formal engineering standard. A clean cut should show three things: no visible whitening along the edge, no melted bead, and no micro-crack lines extending away from the cut. Inspect under direct light at a low angle. Stress whitening and micro-cracks are easier to see at an oblique angle than straight-on.
Sand rough edges with a coarse-to-fine grit sequence suited to the plastic type and surface finish requirement. ABS typically benefits from a finer final pass to reduce visible scratch lines. Verify the grit sequence against the application requirement.
If whitening is present, that section carries residual stress and may spread further under flex or temperature change. Trim back into visually sound material and re-inspect. How far to trim depends on how far the whitening has spread — this varies by material type, cutting conditions, and wall geometry.
Conclusion
Three variables determine whether a plastic box cut succeeds: support configuration, blade selection matched to polymer and wall thickness, and heat control at the cut line. Choose the method — Dremel, jigsaw, handsaw, hot knife, or score-and-snap — based on plastic type and cut geometry. Verify the resin type first. Test on a scrap section of the same box wall. These two steps turn general guidance into repeatable results for the specific material at hand.
At IPG, we design and supply plastic crushing and size-reduction equipment. This gives us direct exposure to how thermoplastic material behaves under mechanical stress at the processing stage. In pre-shredder workflows, plastic boxes are often trimmed before feeding into a crusher — the quality of that trim affects how consistently the material can be crushed efficiently downstream. Whitened cuts, propagating corner cracks, and visible fracture lines all contribute to irregular feed geometry and increased load variation on the shredder rotor. The degree of impact depends on box geometry, material type, wall thickness, and shredder configuration. It should be assessed against specific equipment parameters.
If your operation involves cutting plastic boxes as part of a plastic processing or recycling workflow, reach out. Share your material type, wall thickness, and production volume. We can help align the cutting approach with your downstream shredder configuration, feed geometry, and material handling setup — before the first cut is made.
FAQ
Can a utility knife cut through a plastic storage box?
Not for most storage-grade HDPE and PP box walls. These materials are thick enough and flexible enough that a blade deflects rather than scribes a clean line. A utility knife works on flat, brittle plastic sheet — such as thin acrylic — where score-and-snap applies. Polymer type and wall flexibility determine this, not thickness alone.
Why does my cut crack at the corners of a rectangular opening?
Cracks at internal corners come from stress concentration at the cut terminus. The fix is a corner relief hole at each internal corner before cutting the sides. The hole converts the sharp terminus into a radius and spreads the stress around the perimeter. Size the hole large enough to create a visible radius.
What blade TPI reduces cracking when using a jigsaw on plastic?
Use a high-TPI blade with minimal tooth set, designed for plastic or non-ferrous metal. Verify the TPI against wall thickness — thinner walls suit finer pitch; thicker walls may need lower TPI to prevent clogging. Test on a scrap section of the same box before making the full cut.
What causes the melted, re-welded edge after cutting?
Heat buildup at the blade contact point. This comes from pausing with the blade inside the cut, or feeding too slowly relative to blade RPM. The softened plastic re-welds behind the blade as it cools. Keep a steady forward feed, and withdraw the blade fully before any pause.
Is it safe to cut plastic boxes indoors?
Sawing generates fine particulate. Hot-knife and soldering methods generate fumes that need local exhaust ventilation or outdoor conditions. Do not rely on general room airflow for thermal cutting. Check the material’s SDS for dust and fume guidance. Score-and-snap on brittle flat sheet produces minimal particulate and carries the lowest airborne exposure risk of all methods described here.
Do these methods apply to all plastic box types?
They apply to standard storage-grade HDPE, PP, and ABS boxes in normal condition. Boxes with insulated or foam-composite walls, structural ribbing through the cut zone, laminated layers, or significant UV aging need separate evaluation. Verify the cutting approach against the actual material state.